
by Ryan Thomas
It seems simple enough. You record your tracks in your digital audio workstation (DAW), set the faders on each track, add effects plugins to each track, and viola — you have a mix. And in truth, it really can be this simple. But what happens when your project swells to 30-plus tracks? Does your machine have the processing power to keep up with the demand of that many simultaneous effects-laden tracks? How about fader adjustment? Do you have the patience to adjust all of the drum tracks every time you want to raise or lower the kit’s volume? What if you want to equalize a track’s reverb without affecting the original dry signal?
If you are like me, your plugins inexplicably bog down your DAW before your CPU cores max out, and you hate meticulously adjusting a bunch of faders any more than is necessary. Issues like these are the reason that all modern DAWs come with robust and versatile internal signal routing options that allow for better organization and grouping of tracks, greater efficiency regarding plugins and CPU overhead, and more potent audio-manipulation options.
Grouping Tracks via Stereo Busses
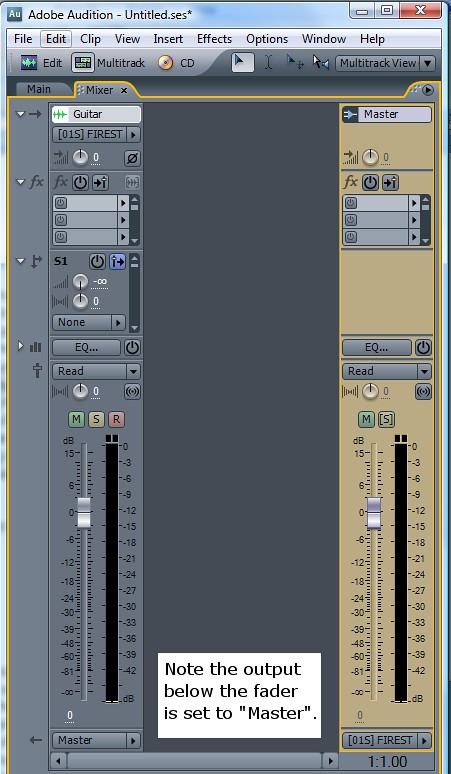
By default (as shown above) your tracks are likely set to output to your master fader. But why not make a short detour along the way? One way to help organize your project is to arrange similar or associated tracks into groups by routing their outputs to a stereo bus. This bus functions exactly like the master bus except that its output is routed to the master bus rather than the speakers. I often send all of my drum kit tracks to a stereo bus, which I name “drum bus,” for example. This way, once I have achieved a decent drum sound, I can control the master volume of the entire kit from one fader. I will often do the same to my electric and acoustic guitars, backup vocals, and anything else that functions as a group. This way, by the end of the project, I only have 10 or so faders to adjust rather than 30.
Efficiency and CPU Overhead
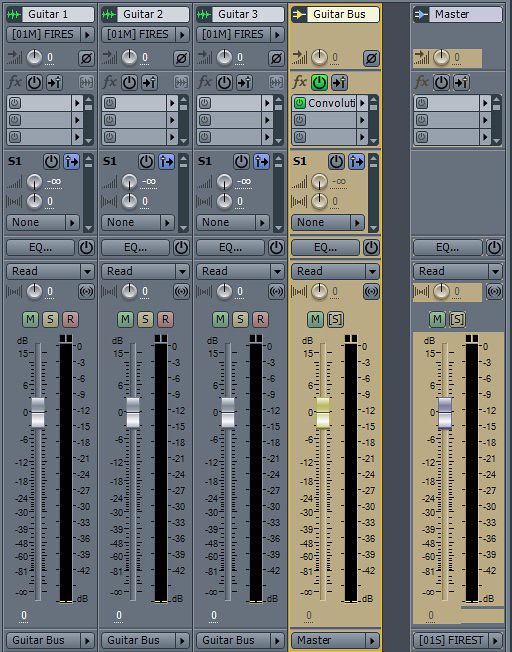
Grouping tracks into buses accomplishes more than organization, however. Bus-grouping allows the user to reduce the number of CPU-hungry plugins required to achieve the desired effect. In the image below, my goal is to have a reverb effect on my three guitar tracks. I can either apply an instance of the reverb plug in to each track.
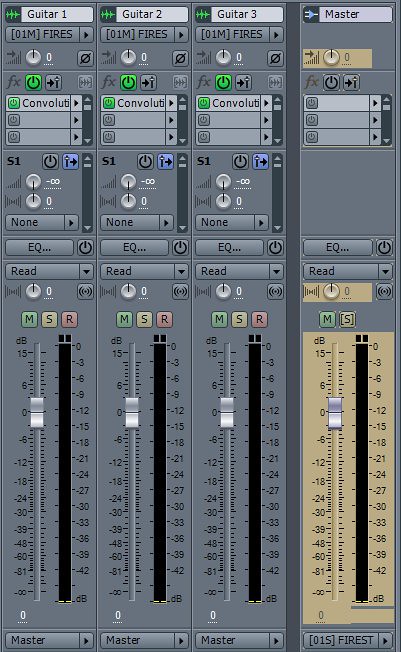
Or, I can group them into a stereo bus and apply the reverb plugin to only that bus, achieving the same result with far less CPU overhead.
Auxiliary Sends and Dedicated Effects Buses
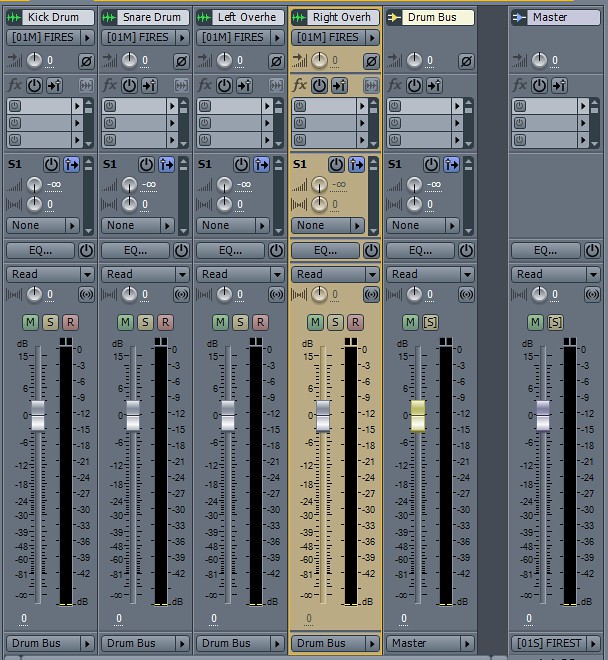
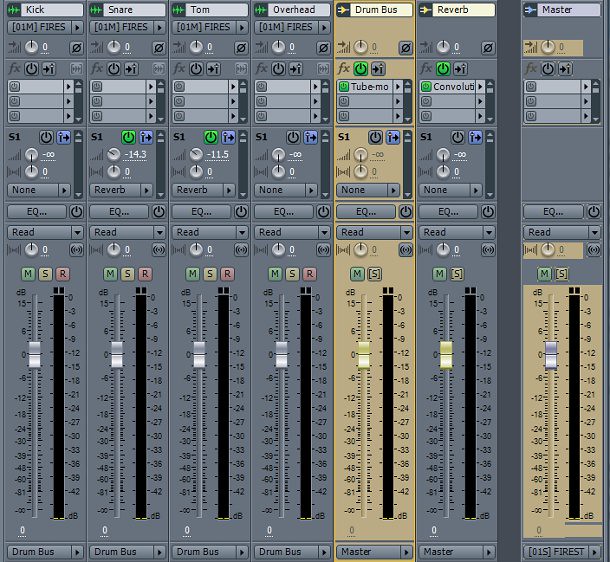
Most of my drum production includes a compressor or limiter on my drum bus; it tightens the sound and tames wild transients. This is easily accomplished by inserting the appropriate compressor plugin on the drum bus. But what if I want reverb on the snare and toms but not the overheads or kick drum? I can either add separate instances of reverb on the snare and tom tracks or utilize a far more elegant solution: a dedicated effects track!
Each track within your DAW utilizes a main output (under the fader in the pictures) and a number of auxiliary “sends” (labeled “S1” in the picture below) which operate the same way as the main output. This allows you to send the output of a track to more than one destination: the main output goes to the drum bus, while the auxiliary send goes to a bus called “Reverb”. This “Reverb” bus track has its plugin set to only output wet sound, that is, only the reverb tail. In this way, the main output (drum bus) is in charge of the dry sound, and by turning up the volume of the auxiliary send, you add reverb to the track. Below, the tracks, "Snare" and "Tom" are sending auxiliary outputs to reverb, as signified by the green power light in the "send" section and the word "reverb" in the destination.
In this way, one reverb plugin can be used to affect every track in the project to varying degrees. You simply dial in the amount of signal going from each track’s send to the reverb bus depending on how much reverb you want. Guitars, drums, vocals and anything else can share the same reverb plugin, dramatically reducing your CPU usage.
A further advantage of using dedicated effects tracks is the ability to manipulate the dry and wet aspects of the sound independently. For example, you can add high frequencies to a vocal track (main output), while reducing those same frequencies in the reverb tail (reverb bus), creating a crisp track with a softer, subtler sounding reverb.
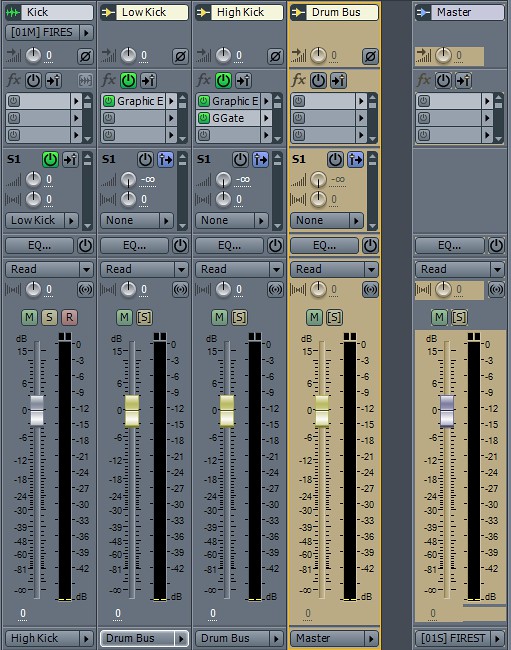
Finally, sends can be used to split a signal into two halves — a low half and a high half. You set up two sends on one track going to two different busses. On one bus, you use a shelving filter or graphic EQ to filter out all of the low frequencies, and on the other, do the opposite and filter out the highs. When both busses are played simultaneously, the result is the original sound. In this way, you can manipulate the high and low aspects of a track independently to great effect. On a kick drum for example, you can gate only the high part of the sound to more accurately filter cymbal bleed while leaving the resonance of the low frequencies intact, for example. The possibilities are limitless.
These are only a small fraction of the ways in which a mixer can use sends, buses and routing option to his advantage. That’s the amazing thing about doing audio work in the 21st century — the sky’s the limit regarding technical creativity.
Ryan Thomas is a musician and home audio engineer from Lincoln (soon to be Omaha). Yeah, I’m using Adobe Audition 3. It was cheap. Haters gunna hate. If you have come up with any great routing tricks, please share in the comments below.