
by Ryan Thomas
I was once talking with a wise man about the tedium of regular routines and the dissonance I felt when confronted with the execution of these tasks (I believe it was the morning wake-up routine). In his Southern England accent he replied, "Yes, Ryan, but you see, you just have to turn these events into rituals. Then, then more you do them, the more meaning they take on." Although I haven't been successful in the global implementation of this philosophy — and many of my life's routines still create a sense of boredom and a longing to be doing anything else — I have created one particular ritual that I now enjoy, and almost look forward to: changing my guitar's strings and the accompanying general maintenance.
My guitar maintenance ritual is divided into three main stages: cleaning/polishing; string changing; and neck/bridge setup. While cleaning is quite straight forward, the art of string changing is a bit more involved. The third stage, guitar setup, is the most involved. The general parameters associated with guitar setup are: the neck's shape (inward or outward bow); the height of the strings above the frets; and the length of each string (which affects the guitar's intonation, or how much change in pitch each fret produces). Because of the myriad specifications for individual guitars, the relatively specific tools required, and the possibility of permanent damage to your guitar should you mess up, I will not discuss setup. If you are not comfortable researching your guitar's setup specifications and procedures, just take it to the shop and have their tech do it for you.
Step 1: Workspace and Music
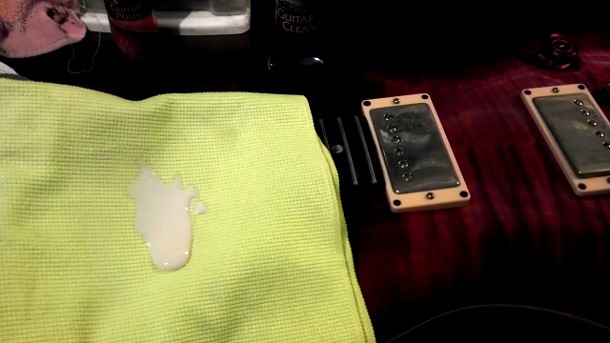
In order to easily work on your guitar, you should create a work-space that compliments your activity. I like to work on a table or desk that is a bit less than waist-high. The guitar's head should be elevated to allow for easy access to the tuning pegs. I use a cigar box with a pad on top, as well as some packing foam to protect the guitar's finish from the hard desk surface, as shown below.
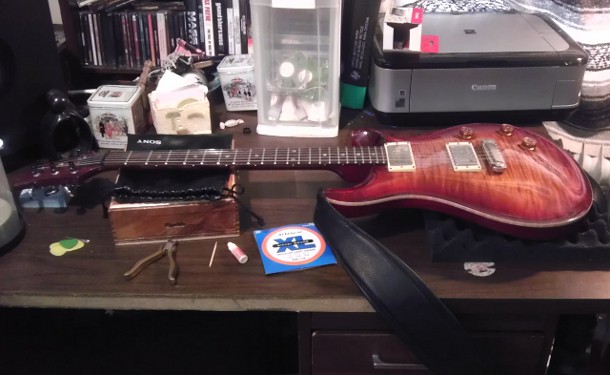
Also shown above are some essential tools for the the job: a pair of wire cutters; a toothpick; some nut lube (seriously); and a set of new strings. Depending on your guitar, you may want to purchase a string winding wrench (it's cheap and allows you to wind your strings much more rapidly). You will also need to buy a new set of strings. Generally speaking, the brand is not as important as the gauge. Gauges are often referenced by the size of the smallest string. A set with a high E string of .009 inches are "nines" for example. I use "tens" on my electric guitars. Bigger strings sound thicker and warmer but are harder to bend and place more tension on the neck (which can warp the neck in the longterm).
After you have your work-space constructed and your guitar in place, pick out some appropriate music to play while you work. My last ritual included my Ravi Shankar Pandora station; your tastes may differ, however.

Step 2: Remove the Old Strings.
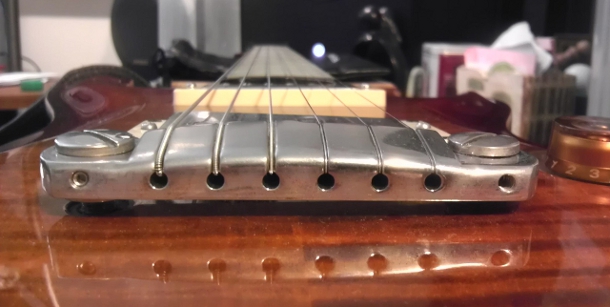
When I restring my guitar, I always take all of the old strings off at once, and then put the new strings on. Some people advocate replacing each string individually so there is always tension on the neck. The logic is that allowing the neck to relax is stressful to the wood. While there may be merit to this method, it makes it more difficult to clean the guitar, and any time you perform a setup you have to relax the strings anyway, so it's bound to happen periodically. After removing the strings, you may be able to easily remove the bridge. If so, do it, but take care not to bump or alter the settings of any hardware (such as those big bolts in the picture, which adjust the string heights). Otherwise just take the strings out of the bridge and set them aside.
Step 3: Cleaning and Polishing
Now that the strings are removed, you will probably be able to see the sweat from your last show and other grimy stains on the guitar's body. I really enjoy removing this gunk and prepping the guitar for a wax. The method you use will depend upon your guitar's finish. My PRS uses an automotive style clear-coat, but some electric guitars expose the wood. For plastic finishes, a guitar cleaning spray (probably similar to glass cleaner) in conjunction with a soft rag can be used to clean the guitar. For other guitars, you may want to research an approved wood cleaner; I've never owned one. Take care to protect any metal surfaces when spraying on your cleaning agent. I cover them with my rag.
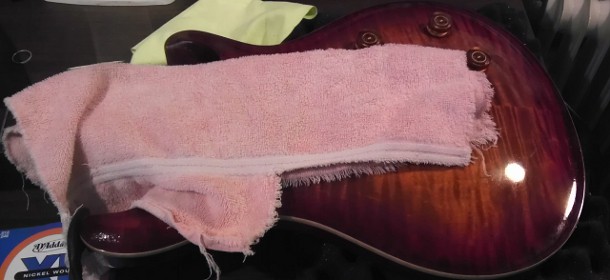
Now that your guitar's surface is clean, you should polish the surface to add luster and hide years of pick wear and general minor blemishes. Because of the finish's automotive heritage, it should be no surprise that we will essentially be waxing the guitar. Using a polishing cloth or soft waxing pad, apply the guitar wax to the guitar in a circular motion much as you would to a car. As you apply the wax and feel your cloth gliding over your guitar's curves, imagine the work that has gone into the creation of the instrument, from the gathering of the raw materials, to the conception of its form, and finally the construction. It's amazing that instruments of such beauty exist at all, let alone in the numbers that they do.
Once the wax has been applied, let it sit and dry for a moment while you enjoy warm drone and twang of the sitar. If your bridge is removable, you can begin placing the new strings in the proper holes. Be careful not to mix them up. I have done this a few times and it breaks the ritual and your sense of calm.
Now you can remove the wax with the dry part of your cleaning rag. If you want to be thorough, you can apply more than one coat of wax; you will see diminishing returns with each coat, of course. Once the wax has been removed, you should take a moment to admire the lustrous sheen that the polish has created. If you can see your reflection in the finish, you have succeeded.
If the guitar has aged, you will likely notice that your pickup covers (if your guitar has these) are highly tarnished and no long mirror the world as they used to. PRS recommends mag-wheel polish, available at your automotive store as a solution, but I have never used it.
Step 4: Lubricate your Nut and Bridge.
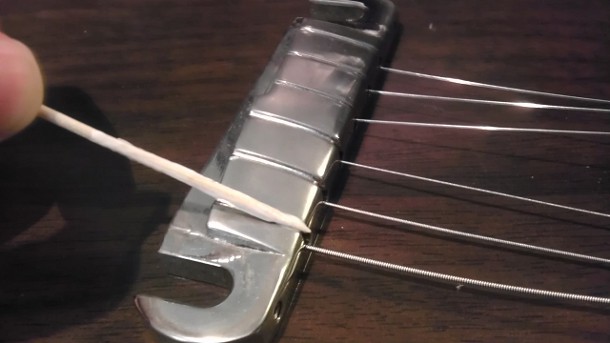
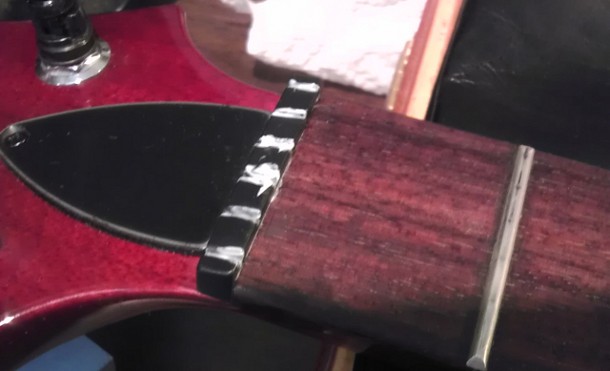
Now that your guitar is cleaned and polished, it is time to wind your new strings. Before you do, however, you should apply some nut lubricant to your nut and bridge where where the strings contact the metal, or nut material. This lubricant ensures that the strings will glide across the surfaces easily and prevents "hanging" during tuning, in which a string gets stuck at a friction point and will pull out of tune during your first note bend. I use a tooth pick to apply the lubricant. The nut is generally more important than the bridge.
Step 5: Wind the New Strings
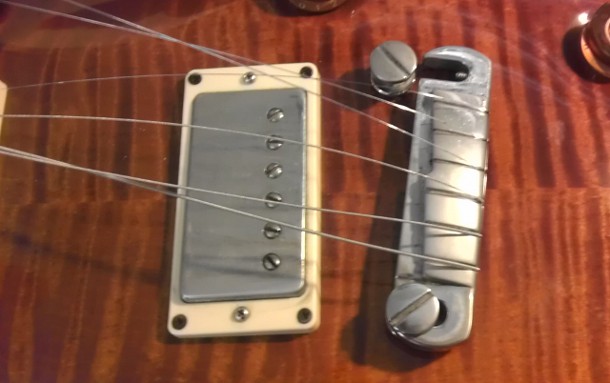
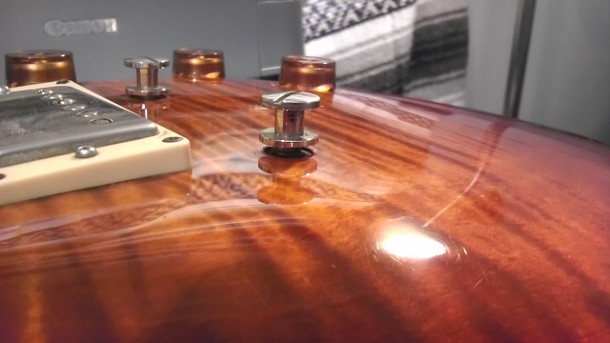
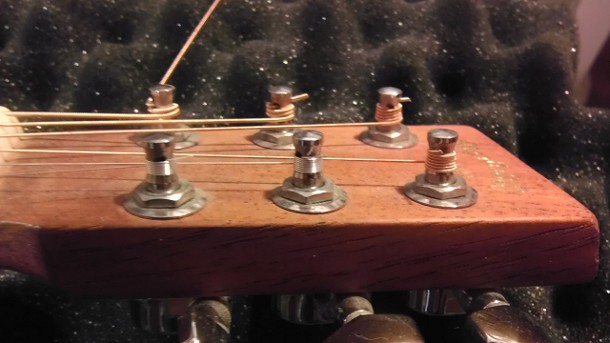
Now you are ready to wind the strings. Guitars with locking tuners make this incredibly easy; you insert the string into a hole or slot, and the tuner pinches the string, holding it in place and allowing you to wind it. This is easier shown than explained. See the picture of my PRS's locking tuners below.

For most other, conventional-style tuners, the process is more of an art form. My goal here is to create as many windings as will fit on the machine head (the part of the tuner the string wraps around). More windings lowers the point at which the string leaves the machine head and creates a larger angle between the tuners and the nut. Larger angles exert more string pressure on the nut and therefore transmit more of the string's vibration into the wood. The resulting tone difference is probably negligible, but every little bit helps.
It is difficult to achieve a great number of windings and you will likely have to experiment in order to achieve the desired result. More windings requires more slack string during the beginning of your tuning process and creates more opportunities for the string to overlap itself during winding. In order to avoid this tangling effect, you must maintain a constant pressure with one hand while turning the tuning peg with the other. If you let go for even a moment, say to scratch that burning itch above your right ear, the string will tangle into a mess and you will have to let the string back out and start over. This is where a string winder becomes so important, as it reduces the time in which you are holding that tension.
Additionally, because the strings get smaller from the lowest string to the highest, the lower strings can accept only a few windings while the higher can accept many more. This means that you must use an increasing amount of slack string from the lowest string to the highest. If you start with the lowest string, you will be able to better gauge the amount of string needed for the next, and so forth. This process can be very difficult but upon completion, the sight of a fully wound machine head is very satisfying. Once all of your strings are wound, cut the excess string with your wire cutters.
Step 6: Stretching and Tuning
Now that your strings are wound, you need to stretch the strings. This is probably the most overlooked part of the process yet one of the most important! If you do not properly stretch the strings, they will stretch during your performance and you will be stuck tuning during/after every song. A new string will stretch a finite amount before it stabilizes; once you've stretched it enough, it will not stretch any more and will generally stay in tune from that point onward. The goal then, for each string, is to reach this point without breaking the string.
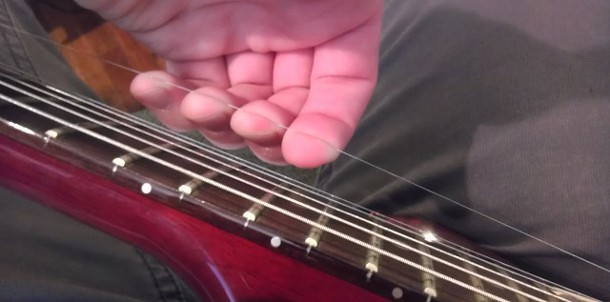
To do this, I generally tune the guitar more or less to standard pitch (it doesn't have to be perfect). Then, starting with the top string, I lift the string about an inch off the fret board and, maintaining this tension, run my fingers from the bridge to the nut and back again several times. This movement helps ensure that the entire string is stretched uniformly. When I reach the bridge and nut, I generally lift the string above the contact point to stretch the areas beyond (between the nut and the machine heads for example). After I have stretched every string and re-tuned, I will generally do some step-and-a-half string bends near the 12th fret to test my stretch. The string should stay in tune after the bends. If it does not, you need to stretch the string further.
Step 7: Final Check
By this point the guitar should be ready to play. However, you should periodically test the action and intonation to make sure the guitar is set up properly. If the neck is not properly adjusted or the bridge is set too low, strings will buzz excessively or "fret out" that is, not play the proper note when pressed, usually towards the highest parts of the neck. If you lack experience in these areas, consider taking the guitar to a professional. If you are handy and adventurous you can research guitar setups online, but you can ruin your neck if you adjust the truss rod incorrectly, so be warned!
The intonation of the guitar should also be tested periodically to make sure that each string is the proper length. If the string is too short, fretted notes will be sharp. If the string is too long, fretted notes will be flat. This can be tested by using a tuner to compare the 12th string harmonic pitch to the 12th string fretted pitch. If the pitches are about the same, the guitar is ready to rock! If not, the guitar needs adjustment.
Ritualism
Restringing and cleaning a guitar is not an exciting venture — it's actually quite dull. But I have found every non-cleaning-related step in this routine to be absolutely necessary. When I'm on stage, I'm not thinking about how well intonated the guitar is, or how perfectly the action is set. The only time I really notice my guitar on stage is when something is amiss, and this routine minimizes the likelihood of any such occurrences. By ritualizing this routine, I have learned to find a simple pleasure in a mundane series of tasks, and this is what motivates me to perform them, time and time again.
Ryan Thomas is a guitarist and home-recording engineer from Lincoln, NE. Have fun asking for "nut lube" at your local guitar store. Leave your own tips and opinions in the comments below.